Refer to the Screenshot:
ABL / Maintain Current Receivables / Current Receivables
Current Receivables
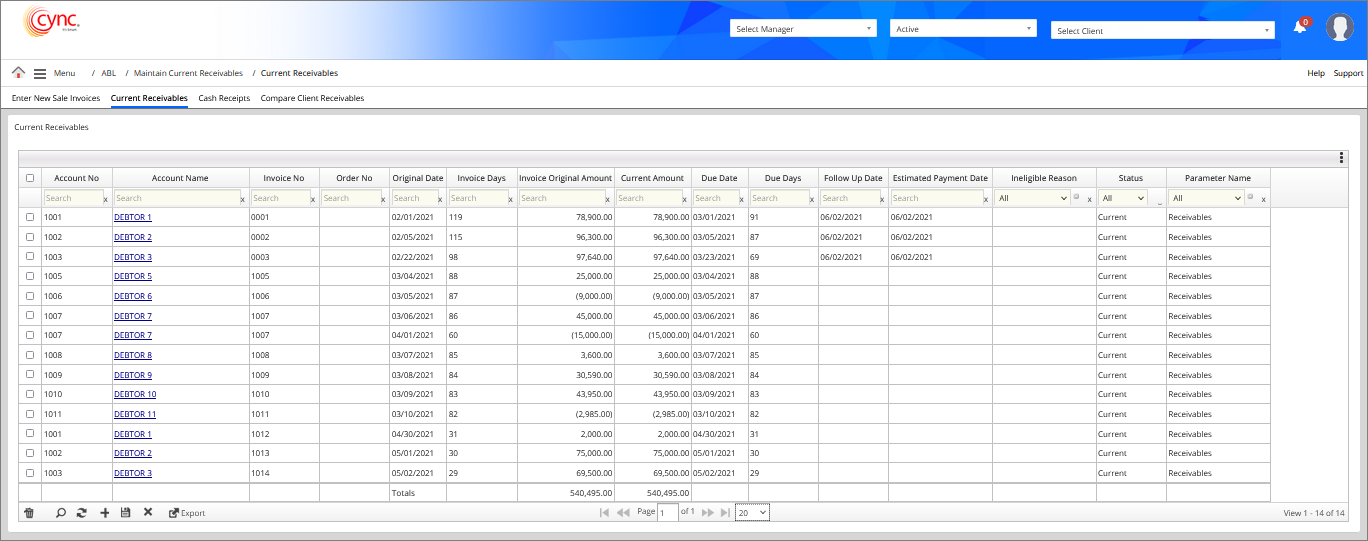
The Current Receivables page shows the current receivables that you’ve been maintaining for your borrowers.
Cync automatically maintains this screen from data entered either via a file upload or from new sales entered in the Batch New Invoice Entry Tab.
This page is only used when the borrower has these parameters: On the Basic Parameters page, enable the Maintain Current AR check box to track and maintain all receivables.
Navigation: ABL → Maintain Current Receivables → Current Receivables
Refer to the Screenshot:
Fields and Descriptions
|
Fields |
Descriptions |
|
Account No |
Specifies the debtor’s account no. |
|
Account Name |
Specifies the debtor’s account name. |
|
Invoice No |
Specifies the invoice number. |
|
Order No |
Specifies the order number of the invoice. |
|
Original Date |
Specifies the original date of the invoice. |
|
Invoice Days |
Specifies the invoice days for the particular invoice. |
|
Invoice Original Amount |
Specifies the original invoice amount. |
|
Current Amount |
Specifies current balance of the invoice |
|
Due Date |
Specifies invoice due date. |
|
Due Days |
Specifies the due days. |
|
Follow Up Date |
Not applicable. |
|
Estimated Payment Date |
Not applicable. |
|
Ineligible Reason |
Specifies ineligible reason applied to the invoice. |
|
Status |
Specifies the status of the invoice. |
|
Parameter Name |
Specifies the parameter name. |
|
Country Code |
Allows to search the account names using the country code. This is a User Defined Field. |
|
Term Code |
Allows to search the account names using the term code. This is a User Defined Field. |
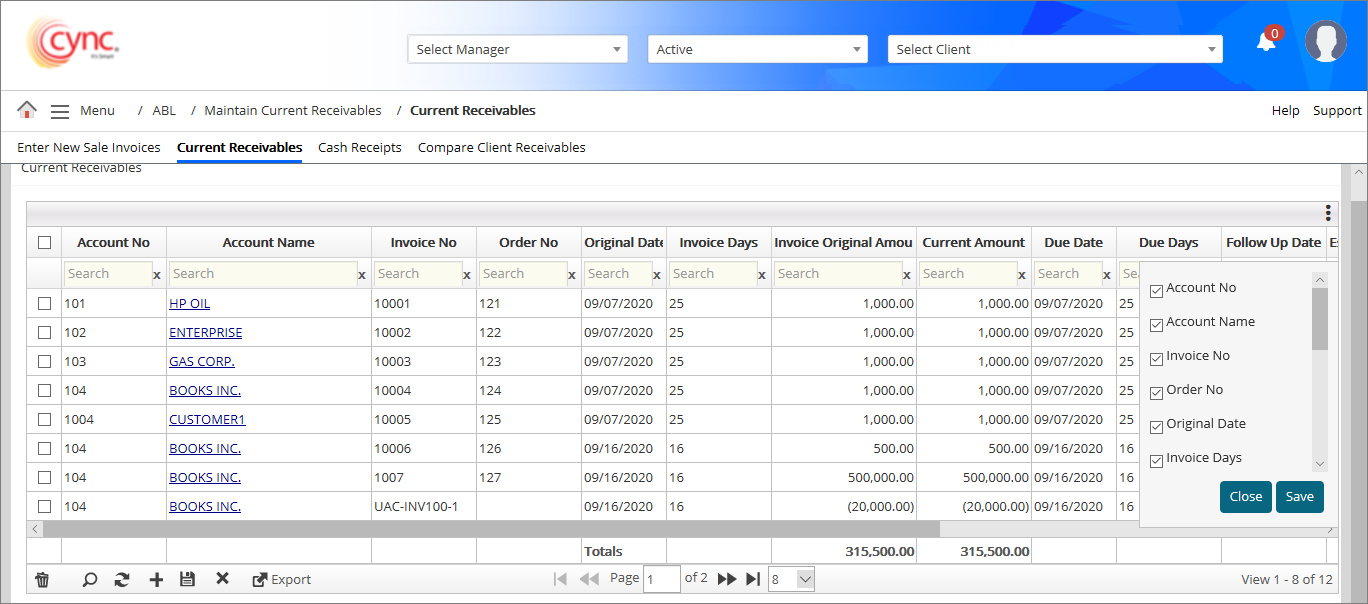
To customize the fields, perform these steps:
1. Click the ![]() button at the right corner of the page, a drop-down list box appears. You can view the list of available fields.
button at the right corner of the page, a drop-down list box appears. You can view the list of available fields.
2. Select the fields you would like to display.
3. Click the  button.
4. Click the ![]() button.
button.
5. Based on the fields selected, the Current Receivables page shows the relevant fields.
Refer to the screenshot:
 The Term code and Country code are user-defined fields. These fields are not mandatory and is available only when the data are mapped under the User Defined Fields page.
The user can log out of the application with the saved fields if required. When the user logs into the application for the next time, the system displays the saved fields by default.
To upload the Invoice documents, perform these steps:
1. Go to Menu → ABL → Maintain Current Receivables → Current Receivables.
2. Click on the Account Name hyperlink. A pop-up box appears.
Refer to the screenshot:
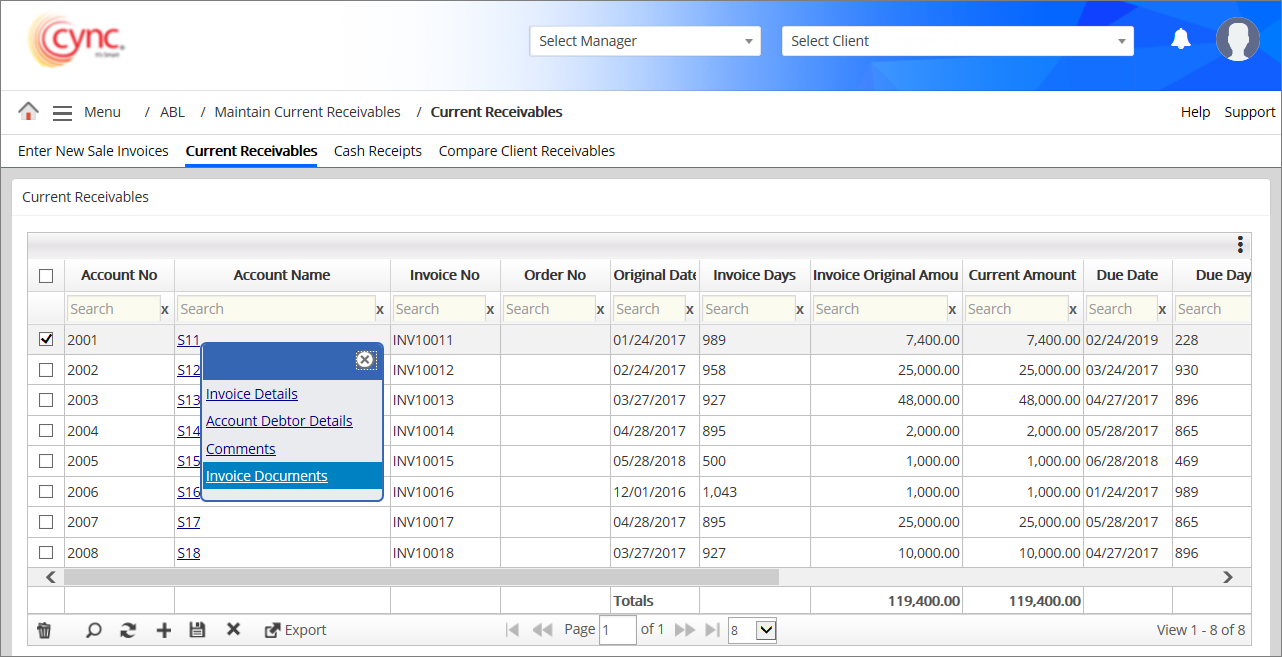
3. Click Invoice Documents. An Invoice Documents page appears.
Refer to the screenshot: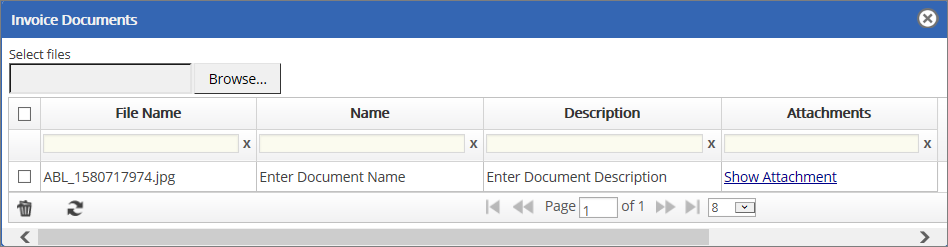
4. In the Select files field, click Browse.
5. Select the file that you want to upload.
6. Click Open. The Invoice document is uploaded and a message "Invoice Documents Successfully uploaded" appears.
To view the uploaded Invoice documents, perform these steps:
1. Go to Menu → ABL → Maintain Current Receivables → Current Receivables.
2. Click on the Account Name hyperlink. A pop-up box appears.
Refer to the screenshot:
3. Click Invoice Documents. An Invoice Documents page appears.
Refer to the screenshot:
4. In the Invoice Documents page, click the Show Attachment hyperlink under the Attachments column for the selected invoice.
A pop-up message "Do you want to open or save Uploaded_filename.jpg from cyncsoftware.com” appears.
5. Click Open if you want to open and view the uploaded invoice document. (Or)
6. Click Save if you want to save the invoice documents.
To delete the Invoice documents, perform these steps:
1. Go to Menu → ABL → Maintain Current Receivables → Current Receivables.
2. Click on the Account Name hyperlink. A pop-up box appears.
Refer to the screenshot:
3. Click Invoice Documents. An Invoice Documents page appears.
Refer to the screenshot:
4. In the Invoice Documents page, select the file that you want to delete.
5. Click the ![]() button to delete the selected document. Refer to the screenshotRefer to the screenshot
button to delete the selected document. Refer to the screenshotRefer to the screenshot

6. Click the ![]() button if you want to delete the documents. The selected document is deleted and a success message “Invoice Document was successfully deleted” appears. (Or)
button if you want to delete the documents. The selected document is deleted and a success message “Invoice Document was successfully deleted” appears. (Or)
7. Click the  button if you want to cancel the document-deleting process.