Administration / User Maintenance / User Defined Field / UDF Mapping
UDF Mapping
Users can map the defined UDFs to other program/s.
The mapping of UDF/s to the program/s can be in the form of one UDF mapping to one Program, one UDF mapping to multiple programs, multiple UDFs mapping to a single program and multiple UDFs mapping to multiple programs.
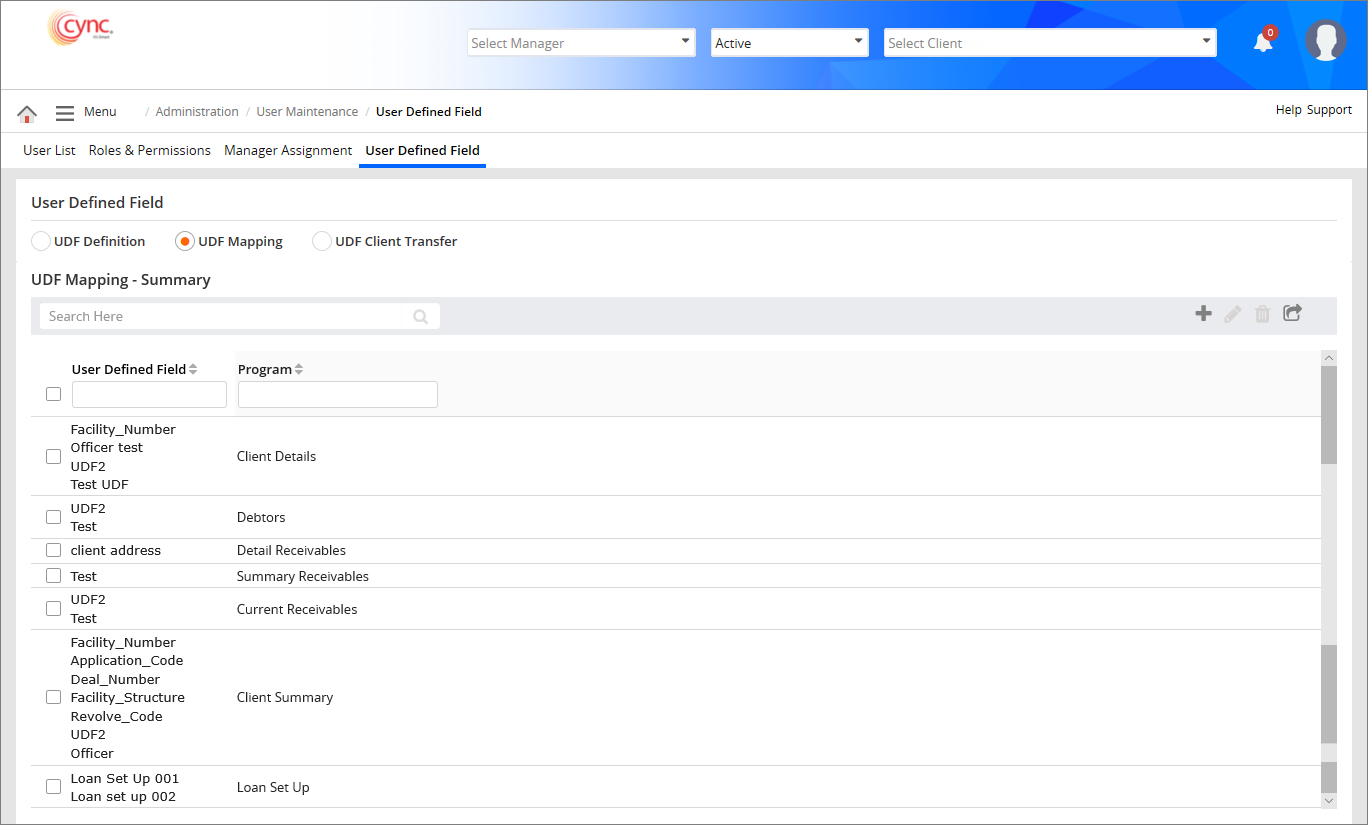
Once the UDFs are mapped to the respective required program/s, the same appears in the UDF Mapping – Summary page.
Users can create a new UDF mapping, and edit and delete an existing UDF. Users can also export the UDF summary with the UDFs and/or program/s.
Navigation: Administration → User Maintenance → User Defined Field → UDF Mapping
Refer to the screenshot:
UDF Mapping
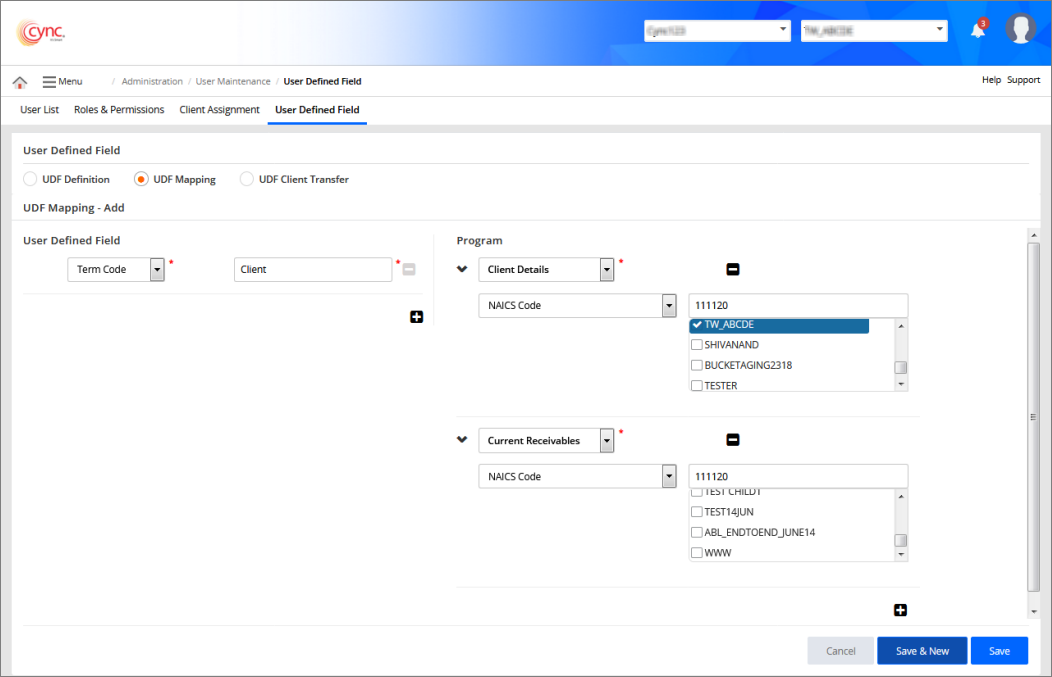
Perform these steps to map an UDF:
1. Go to Administration → User Maintenance → User Defined Field. Select the UDF Mapping option.
2. Click the ![]() button. UDF Mapping - Add page appears.
button. UDF Mapping - Add page appears.
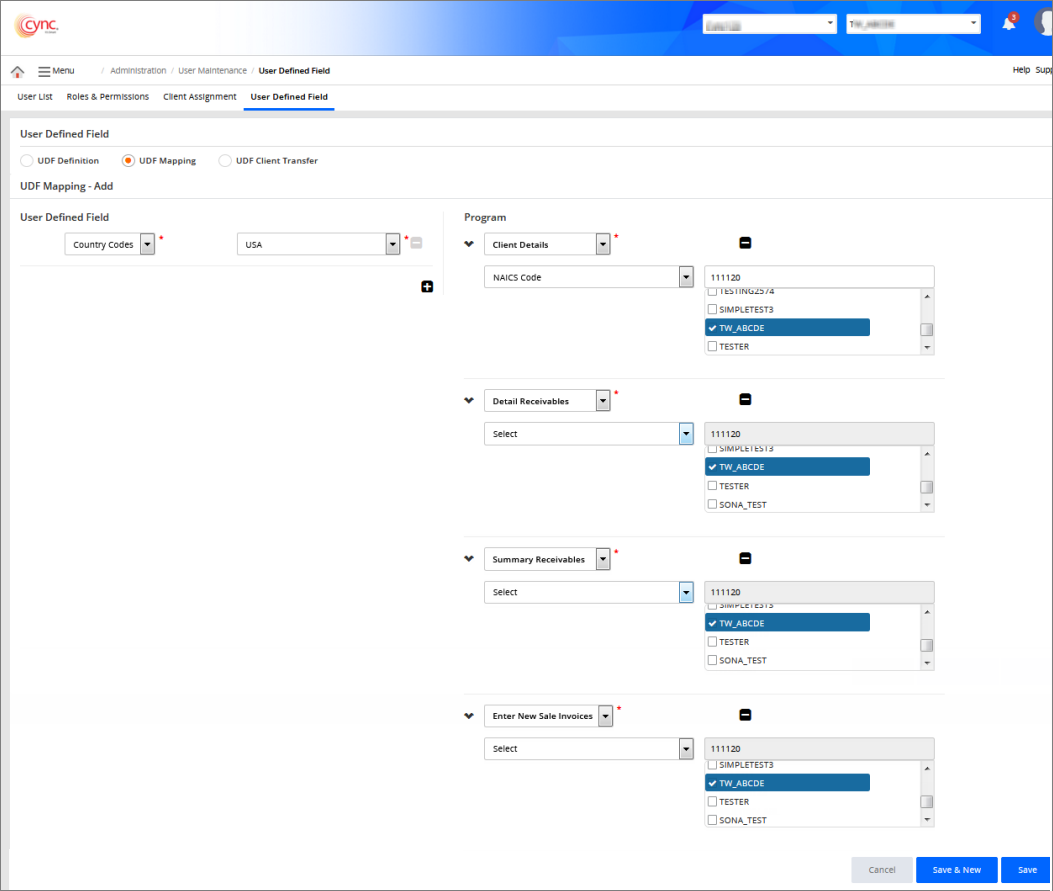
3. In the User Defined Field, select the field name from the drop-down menu.
 Once you select the User Defined Field name, the system displays the new field. You can enter the UDF field value in the new field. The maximum character limit of the UDF value is 1. The UDF value should be numeric.
4. In the Program field, select any of the programs from the dropdown.
5. In the Select dropdown field, select the program.
6. Click the ![]() button to add more programs to the defined UDF.
button to add more programs to the defined UDF.
7. Click the button to remove the selected program.
8. Click the ![]() button to map the program to the UDF.
button to map the program to the UDF.
9. Click the 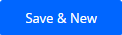 button to map the UDF to a program and then to map another UDF to new programs.
10. Click the  button to cancel the mapping.
Refer to the screenshot:
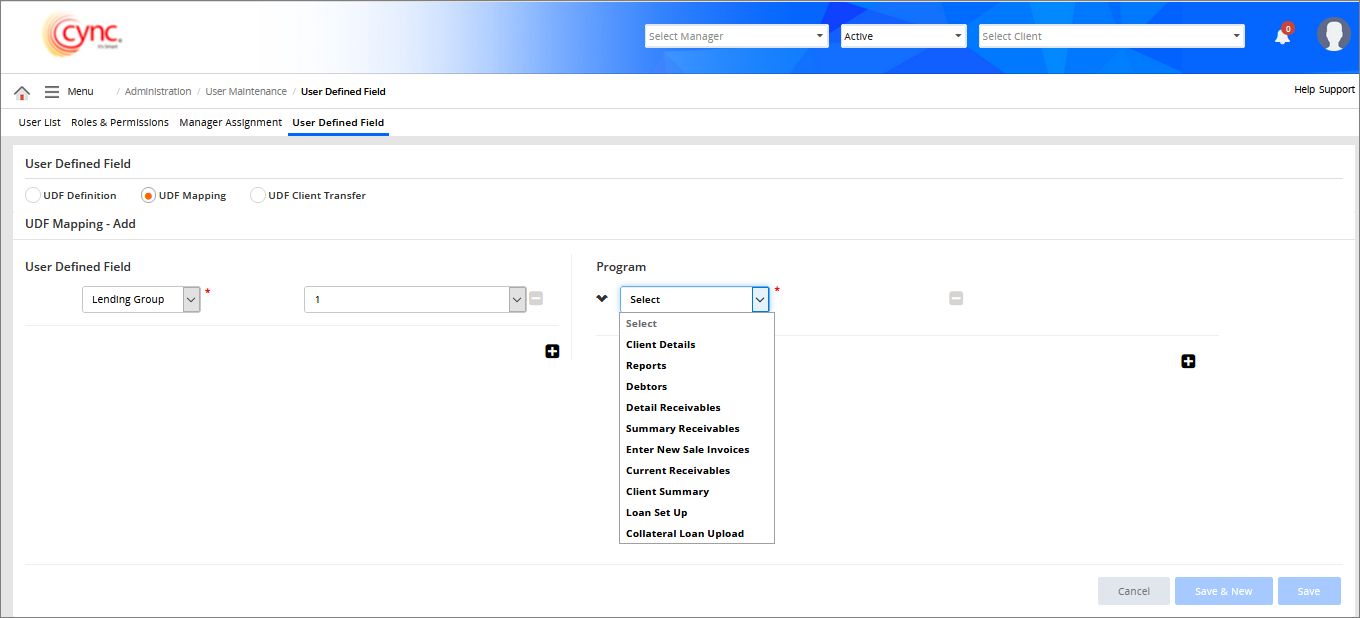
Note that the values that will be defined in the UDF definition section of the UDF mapping page must follow the defined validation type.
Refer to the screenshot:
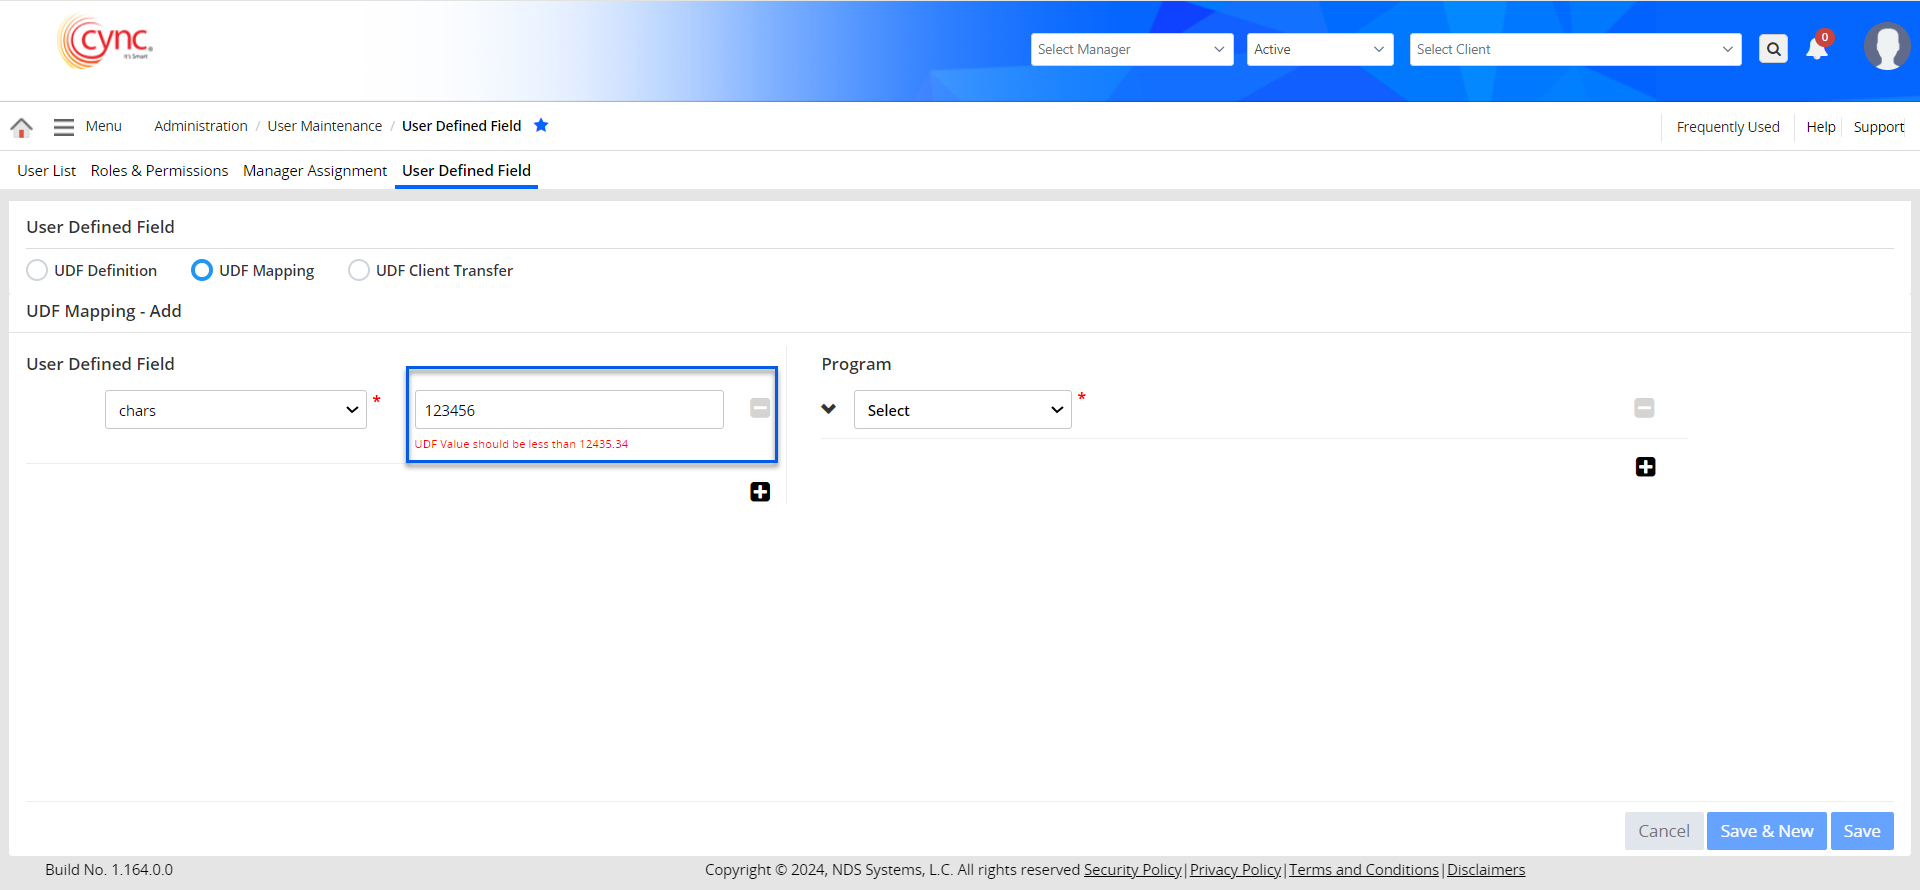
a. The below screenshot shows the validation errors:
i. With the default 2 decimal precision validation.
ii. With the UDF's defined lesser limit validation
b. The below screenshot shows the validation error depicting the UDf's default upper limit validation.
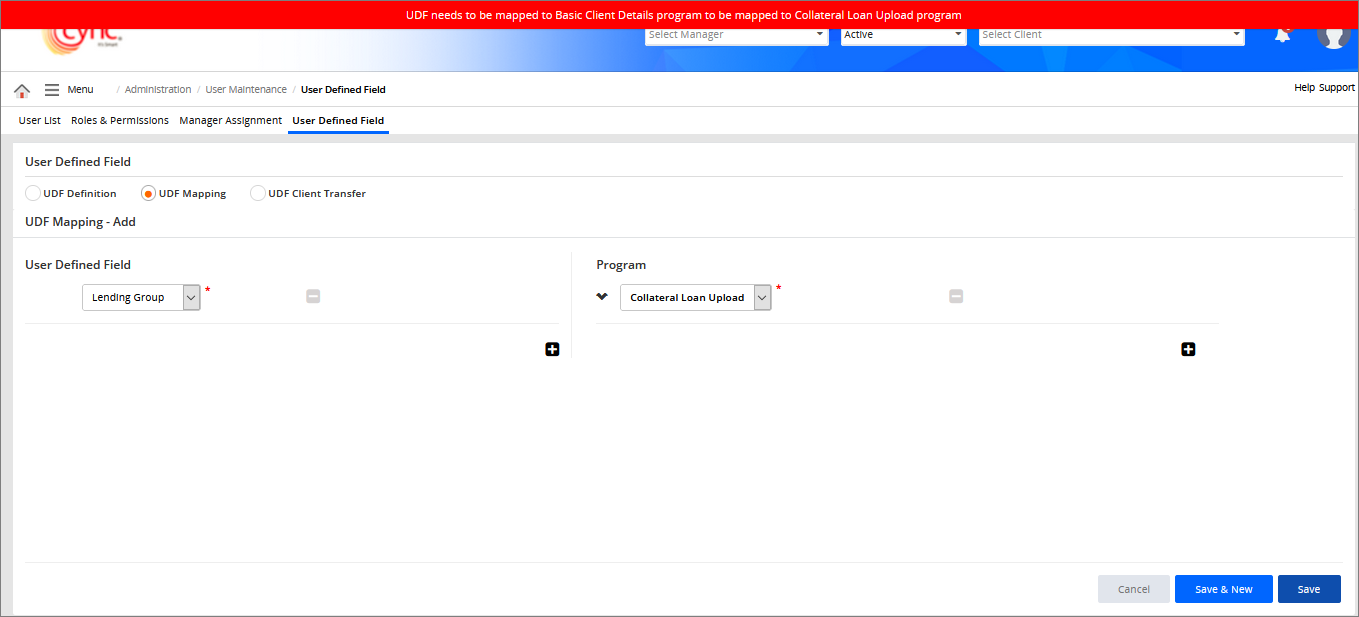
![]() The UDF can be mapped to the Collateral Loan Upload Program only if it is already mapped to the Basic Client Details Program.
The UDF can be mapped to the Collateral Loan Upload Program only if it is already mapped to the Basic Client Details Program.
If the user maps the UDF to the Collateral Loan Upload Program without mapping it with the Basic Client Details Program, the system shows an error notification ‘UDF needs to be mapped to Basic Client Details program to be mapped to Collateral Loan Upload Program’.
Refer to the screenshot:
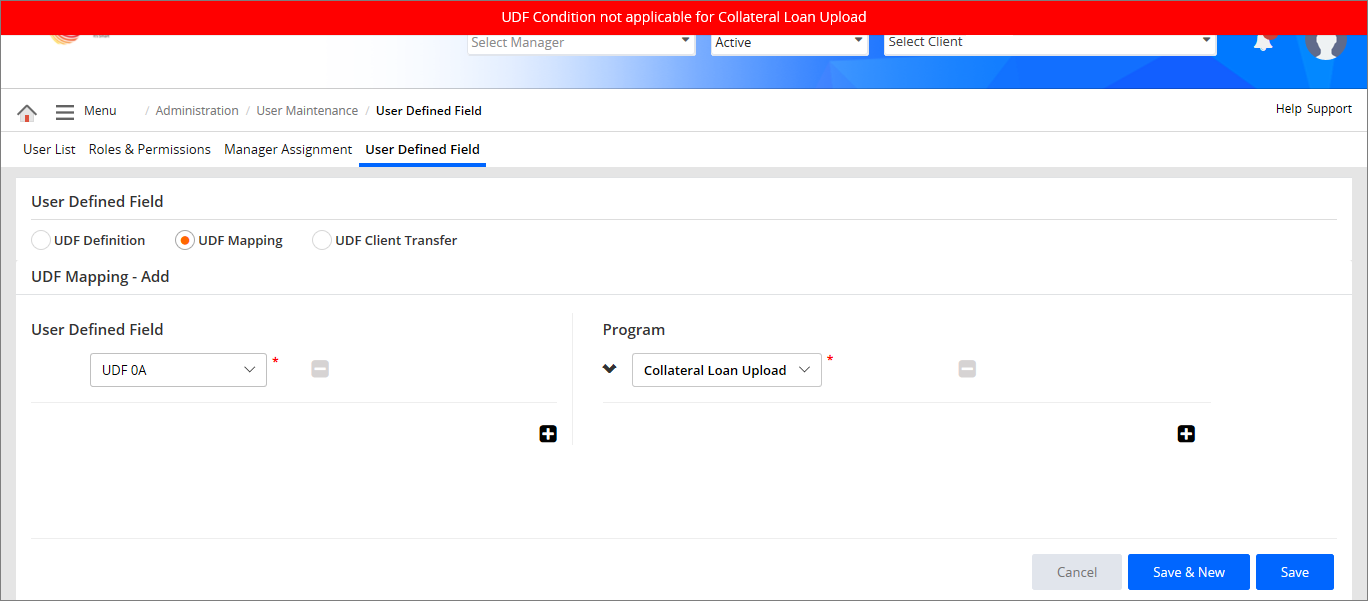
Any UDF can be mapped with the Collateral Loan Upload Program only if the Updatable Field check box or both Updatable Field and Mandatory Field check box is/are selected on the UDF Definition page for the specific UDF.
Also, for the specific UDF in the UDF Definition page, if any other condition check boxes are selected apart from Updatable Field or both Updatable Field and Mandatory Field, then the system shows an error notification ‘UDF Condition not applicable for Collateral Loan Upload’.
Refer to the screenshot:
Edit UDF Mapping
Perform these steps to edit a UDF mapping:
1. Go to Administration → User Maintenance → User Defined Field. Select UDF Mapping option.
2. Select the mapped UDF that you want to edit.
3. Click the  button. UDF Mapping - Edit page appears.
4. In the User Defined Field section, select the UDF value from the dropdown list.
5. In the Programs section, select the program for the client.
6. Click the  button to add UDFs and Programs.
7. Click the  button to remove selected UDFs and programs.
8. Click the ![]() button to save the mapping.
button to save the mapping.
9. Click the  button to cancel the editing.
Refer to the screenshot: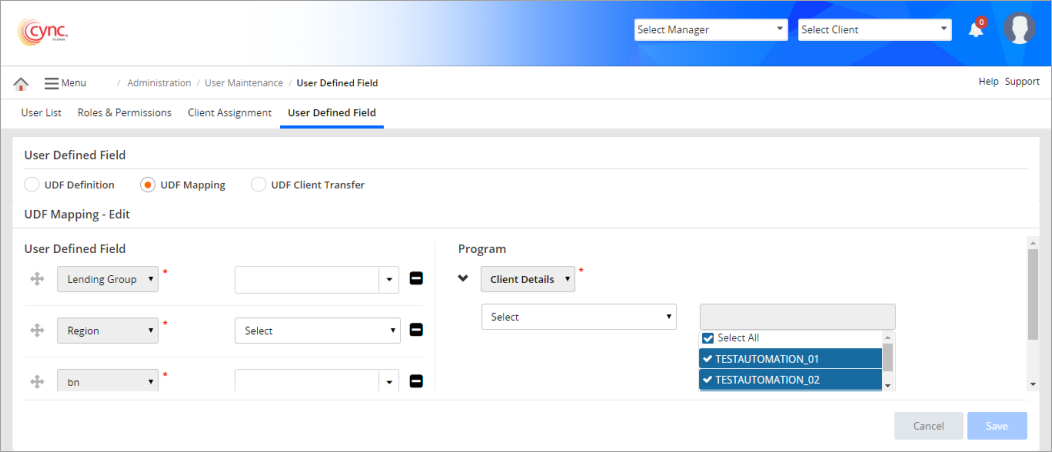
Refer to the screenshot: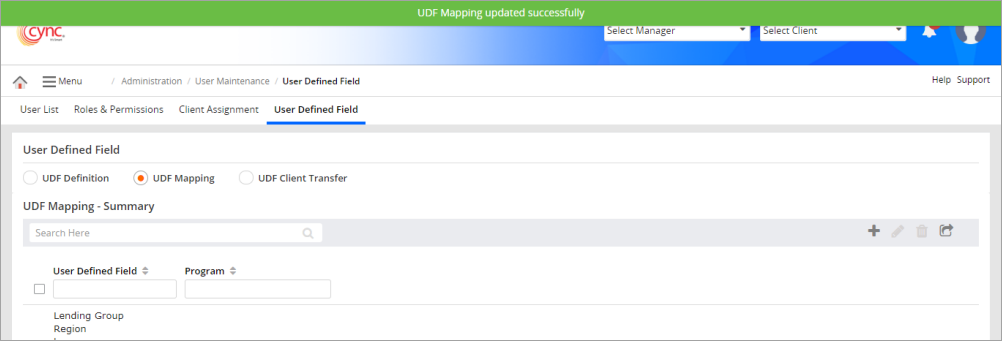
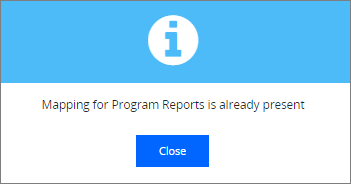
The client data can be mapped with the program for only one time. If you map the data with the same program for the second time, a notification pop-up appears.
Refer to the screenshot:
Delete UDF Mapping
Perform these steps to delete a UDF mapping:
1. Go to Administration → User Maintenance → User Defined Field. Select UDF Mapping option.
2. Select the mapped UDF that you want to delete.
3. Click the  button. A confirmation dialog box appears.
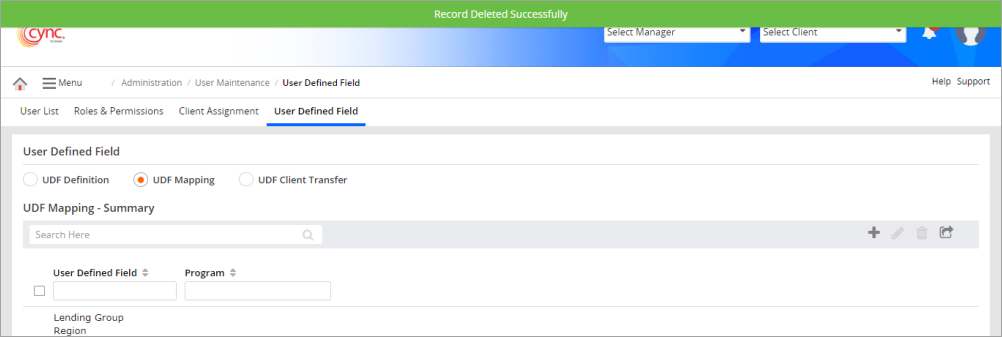
4. Click the  button to delete the UDF. A message appears.
5. Click the  button to cancel the deletion.
Refer to the screenshot:

Refer to the screenshot:
Define and Map user defined fields with examples
The user defined fields are the custom fields defined by the user. For example, consider Country code and Term code as UDF fields. In this case, you can map the created UDFs to different screens such as Data mapping, Detail receivables, Summary receivables as required.
To create and map the Country code and Term code UDFs to different screens, perform these steps:
Create Term Code and Country Code fields under the UDF Definition page.
Map the Created Country codes and Term codes under UDF Mapping page. To map the Created UDF, perform these steps:
1. Go to Administration → User Maintenance → User Defined Field. Select UDF Mapping option.
2. Click the  button. UDF Mapping - Add page appears.
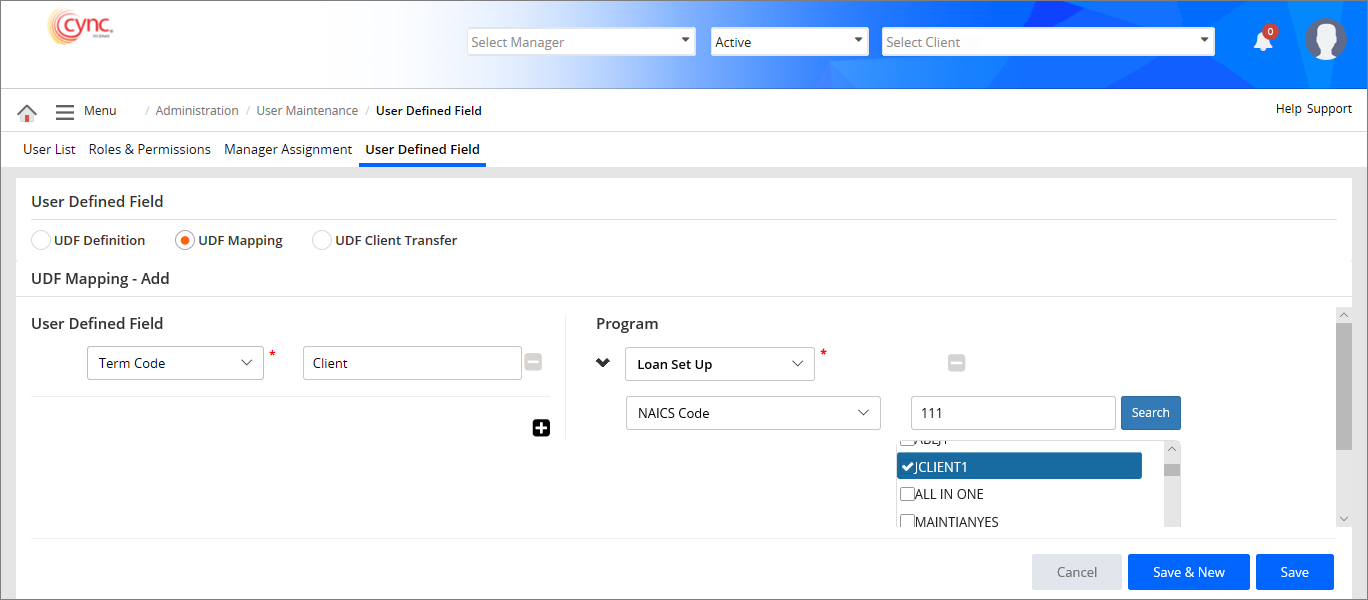
3. In the User Defined Field, select the field (Country Code and Term code).
4. In the Program field, select the program from the drop-down menu. A Select dropdown field appears.
5. In the Select dropdown field, select the program.
6. Click the button to add UDFs and Programs.
7. Click the button to remove selected UDFs and programs.
8. Click the ![]() button to save UDF mapping.
button to save UDF mapping.
9. Click the button to cancel the mapping.
Refer to the screenshots:
10. Once the codes are mapped, the data (Country codes and Term codes) can be viewed under the respective screens and may assign the value for the fields. For example, the Country codes and Term codes UDFs are mapped to Client Data Mapping, Debtors, Summary Receivables, Detail Receivables and Loan Set Up pages. The custom fields can be viewed at respective pages and value for each can be assigned.