
Administration / User Maintenance / User Defined Field /Roles & Permissions
Roles & Permissions
Roles and Permissions page lets you create roles and permissions for the users.
You can select these roles and permissions while creating a user.
Each role has access, create, read, edit, and delete access associated with the features as required.
There are 7 system-defined roles (Administrator, Executive Manager, Portfolio Manager, Collateral Analyst, Borrower, Participation Party, Any Client).
Apart from these defined sets of roles, you can also create custom roles.
The custom role is a part of system system-defined role or another custom role. The role that a custom role is a part of, is called the parent role.
|
Table of Contents |
Navigation: Administration → User Maintenance → User Defined Field → Roles & Permissions
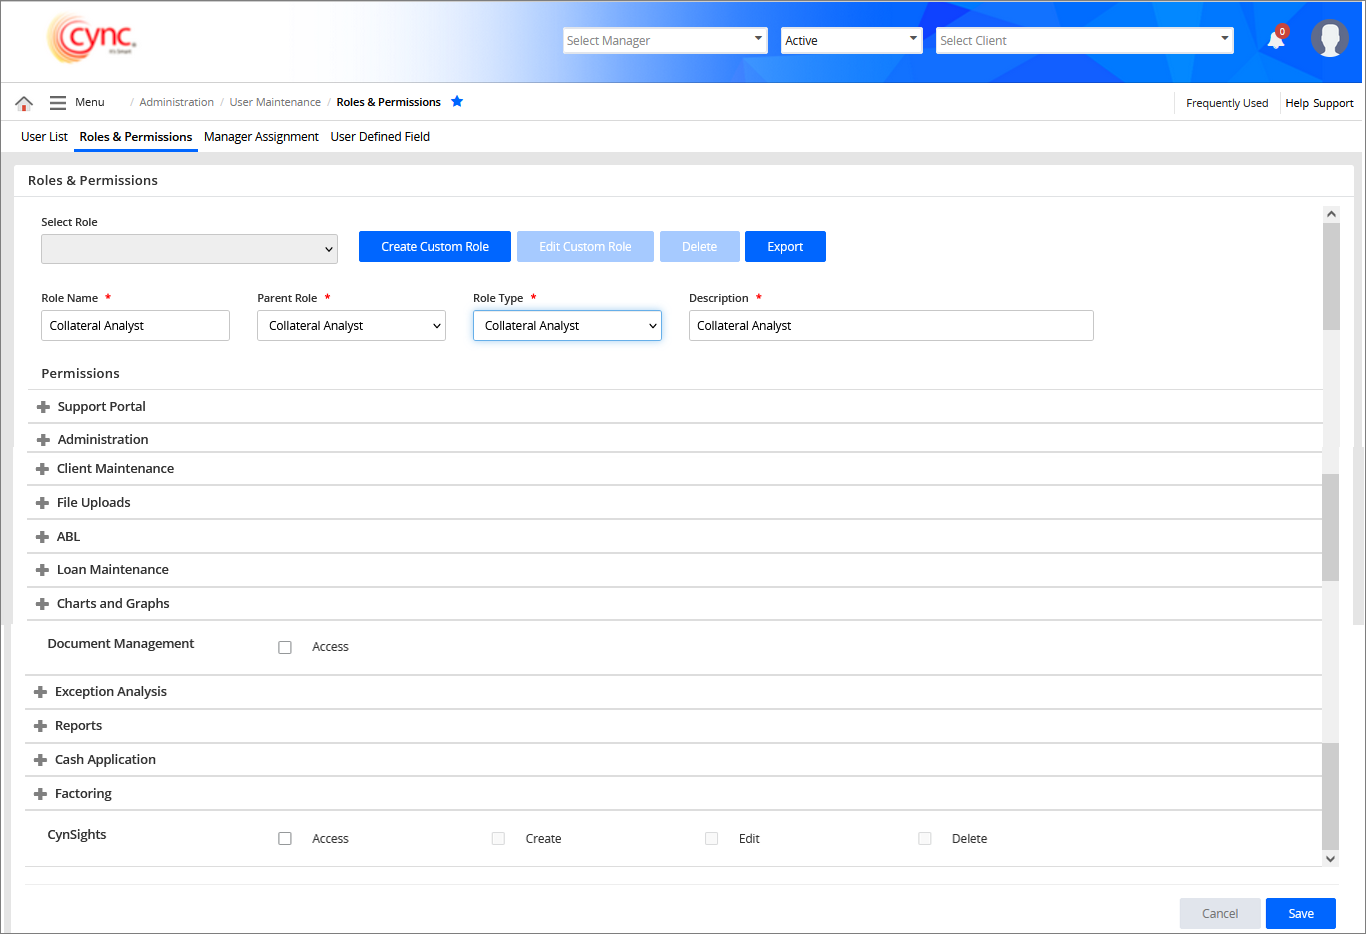
Refer to the screenshot:
The permissions types for a user are as follows:
1. Access – This permission allows a user to view the record for a data item. You must select the 'Access' permission to provide the user with other permissions such as create, detail, edit, delete, etc., In case you do not select the 'Access' permission, you cannot select any other permissions.
Upon enabling the Access permission, the link to access the specific feature will be enabled in the menu so that the user can view and access the specific-enabled feature in the application.
For example, If Access permission is enabled for the Basic Details feature, the user can view the specific-enabled feature link (for example, Basic Details page link) under the Menu item; On clicking the feature link (i.e., Basic Details) under the menu item, the user will be directed to the Basic Details information page.
2. Create – This permission allows a user to create a data item.
3. Edit – This permission allows a user to edit a data item.
4. Delete – This permission allows a user to delete a data item.
5. Detail – This permission allows a user to navigate into a separate view page of the specific-enabled feature from its index page. For example, if Detail permission is enabled for the Client Templates page, the user can navigate to a separate view page of each Client Template created by clicking on the Client Template name.
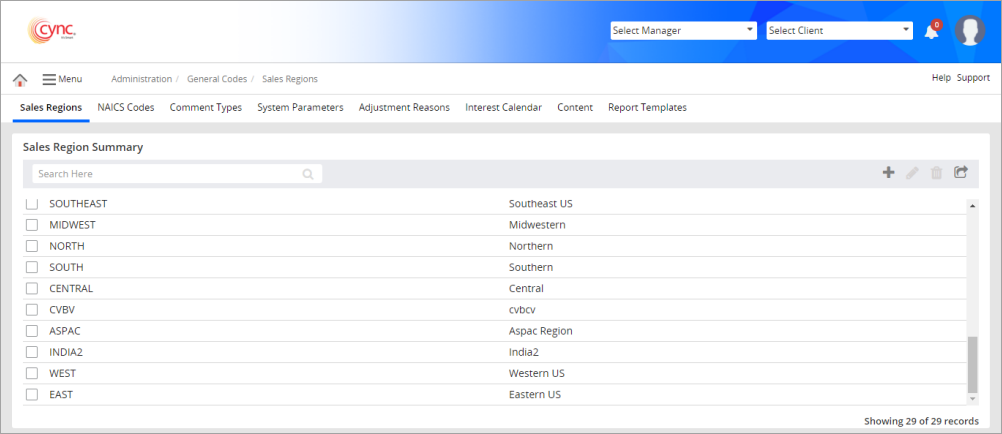
Access view of data item
Access view allows the user to view the list of records of a data item (for example sales regions, NAICS, etc.,). Access permission is required by a user to view and access this page. A user may see the create, edit, and delete permission buttons on this page based on the permissions provided.
Refer to the screenshot:
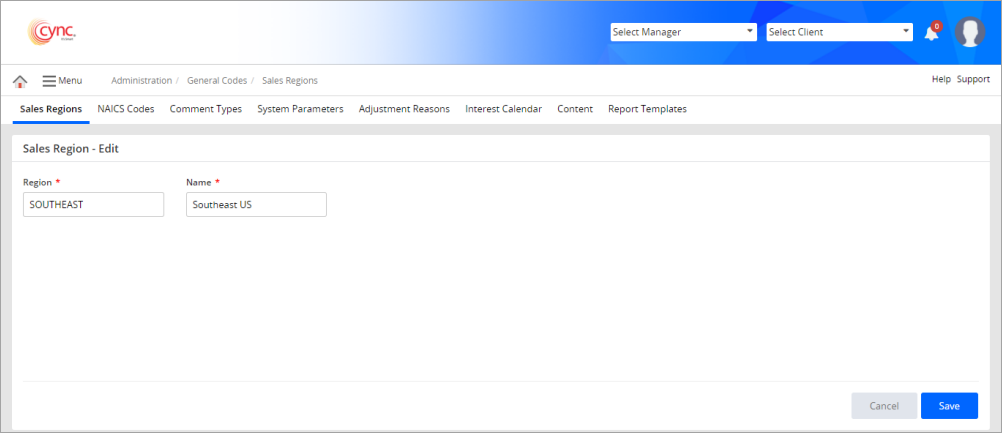
Detailed view of a data item
The detailed view is available when a user clicks on the data item in the record.
Refer to the screenshot:
The Role and Permissions page allows you to edit the permissions for the system-defined roles. You can create, edit, and delete custom roles.
Edit Permissions for System-Defined Roles
To edit permissions for a system-defined role, perform these steps:
1. Go to Administration → User Maintenance → Roles and Permissions.The Roles and Permissions page appears.
2. Select the system-defined role from the dropdown list.
3. Click the ![]() button.
button.
4. Under the Permissions section, click the  button for each permission type and then select the Access, Create, Detail, Edit, and Delete checkboxes to provide the selected permissions.
5. Click the ![]() button to minimize the permission section.
button to minimize the permission section.
6. Click the ![]() button. The role is updated.
button. The role is updated.
7. Click the  button to cancel your action.
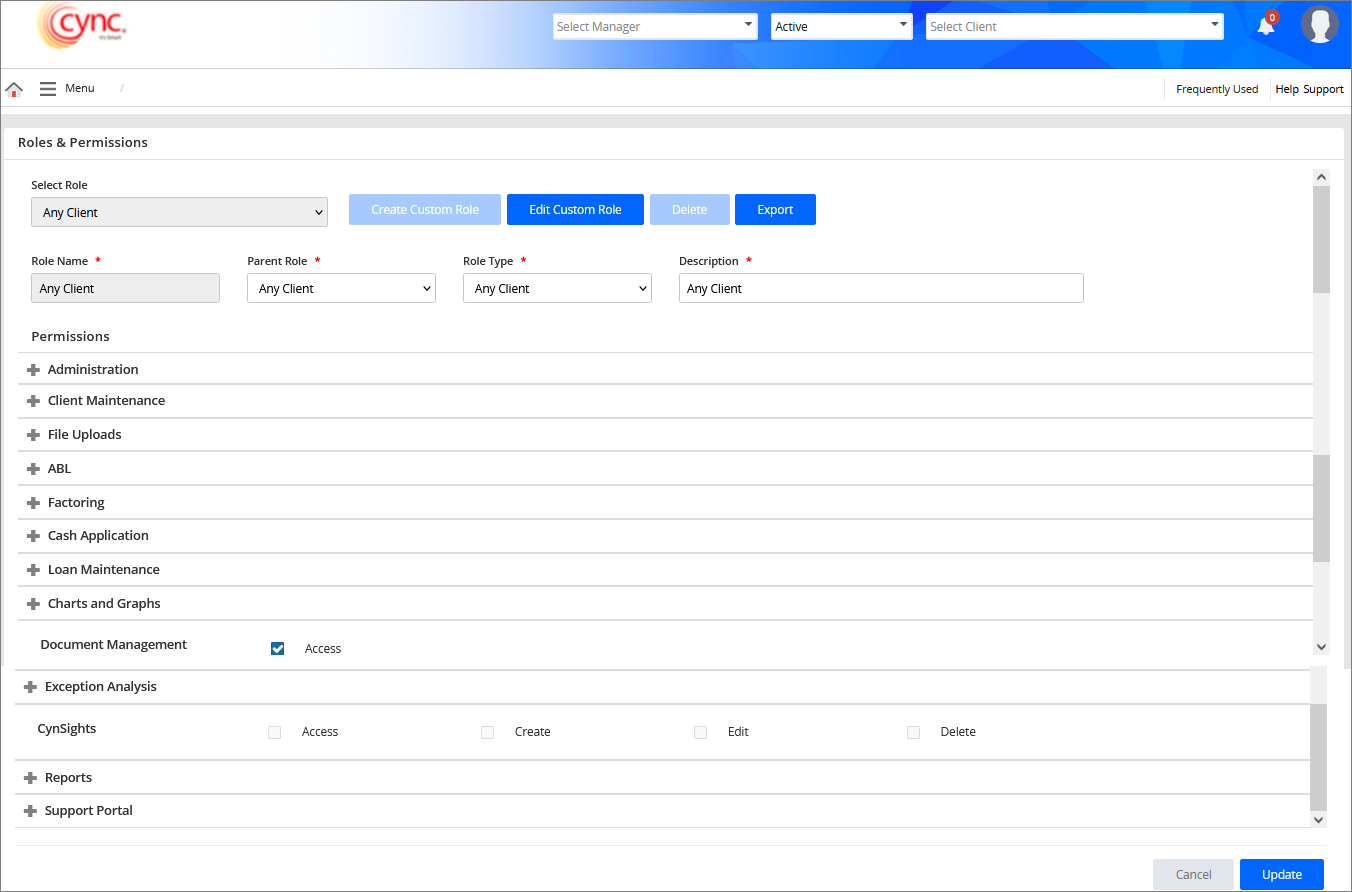
Refer to the screenshot:
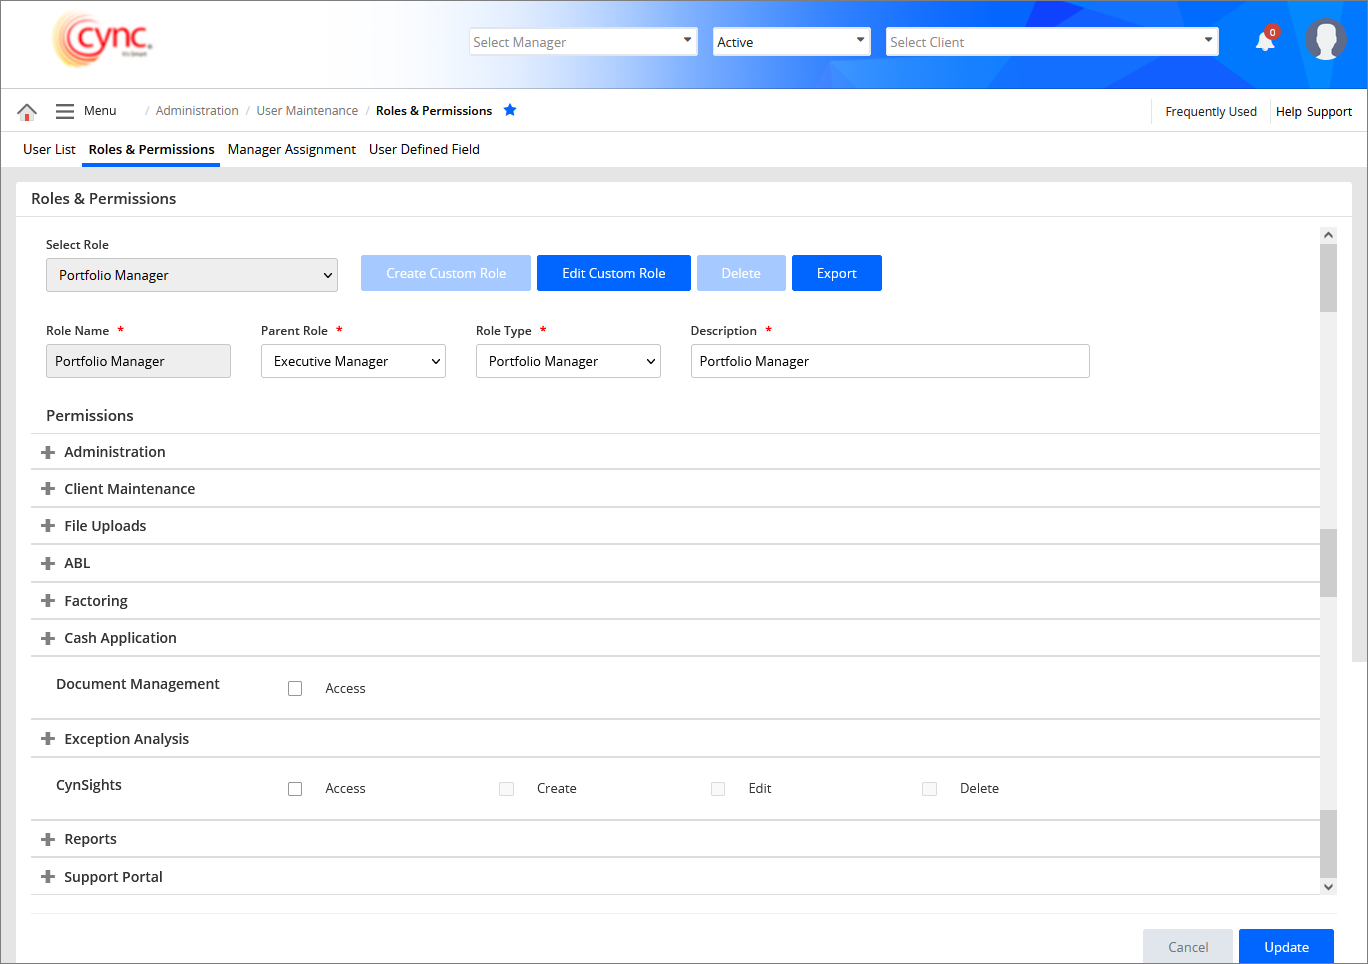
 By default, Access, Create, Edit and Delete permissions to CynSights are disabled for user roles such as Collateral Analyst, Portfolio Analyst, Executive Manager, Any Client or any Custom role.
Only on enabling the permissions, the user roles will have access to use CynSights. All the permissions are enabled for the Administrator role by default. The Borrower and Participation Party roles will always be disabled by default and no permission can be enabled for these user roles by any of the user roles.
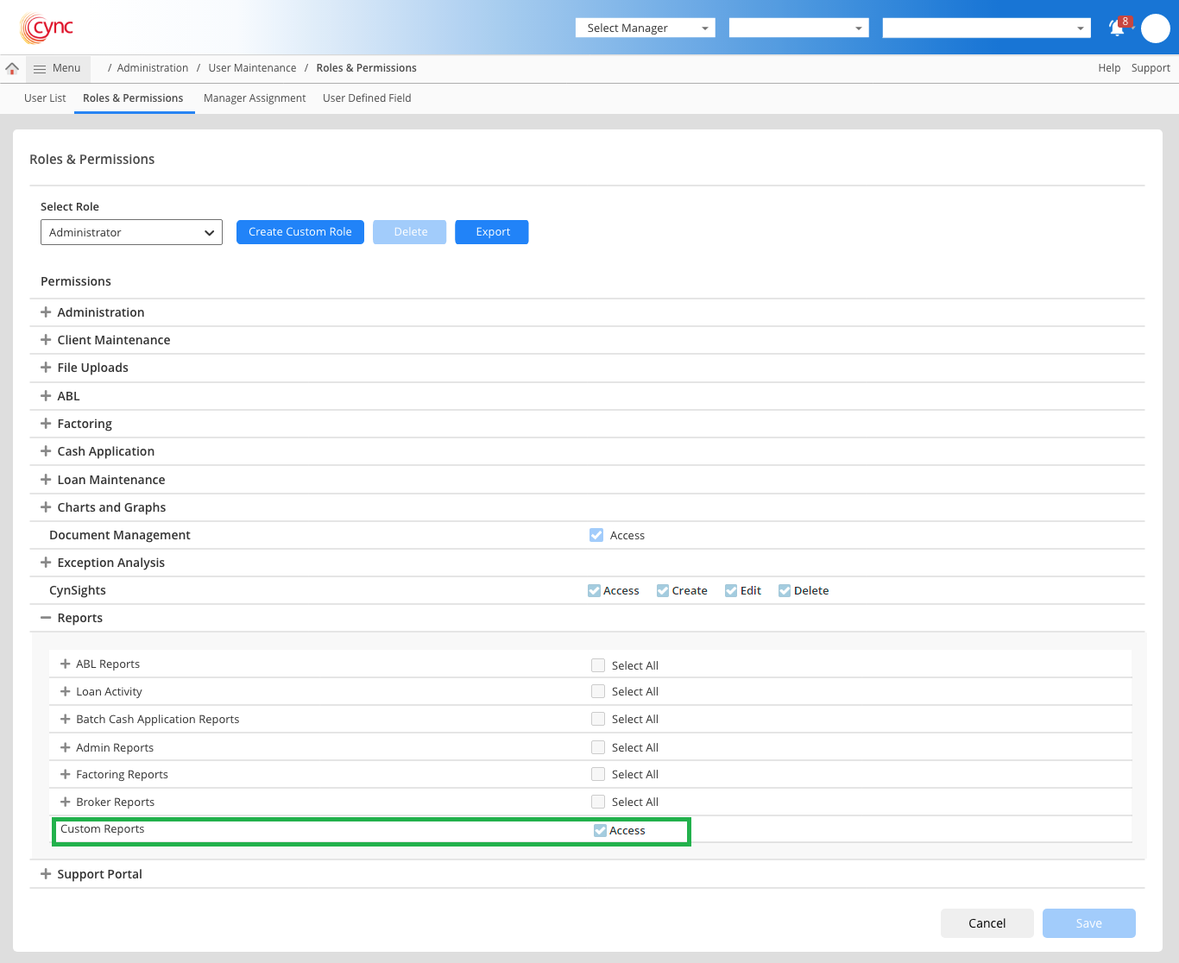
Custom Reports do have only Access Permission like all other Reports in the CYNC application. If Access Permission is enabled, then the user can see the Custom Reports Section on the Reports page.
Administrator, Collateral Analyst, Portfolio Manager, Executive Manager, Any Client and Any Custom Role created for these five roles can have access to CynSights and the Custom Reports.
For the Administrator Role, Access Permission is always enabled and for remaining roles, it is disabled by default. To grant access to other roles, the user has to permit the Roles and Permissions page.
Refer to the Screenshot:
To create custom roles, perform these steps:
1. Go to Administration → User Maintenance → Roles & Permissions.
2. Click the Roles and Permissions tab. The Roles and Permissions page appears.
3. Click the  button.
4. In the Role Name field, enter the role name.
5. In the Parent Role field, select the parent role.
6. In the Role Type field, select the role type.
7. In the Description field, enter the role description.
8. Under the Permissions section, click the button for each permission type and then select the Access, Create, Detail, Edit, and Delete checkboxes to provide the selected permissions.
9. Click the  butoon to minimize the permission section.
10. Select 'Select All' checkbox to select all permissions for a permission type.
11. Click the  button. The role is updated.
12. Click the button to cancel your action.
Refer to the screenshot:
To edit permissions for a custom-defined role, perform these steps:
1. Go to Administration → User Maintenance → Roles and Permissions. The Roles and Permissions page appears.
2. Select the custom role from the Select Role dropdown list.
3. Click the ![]() button.
button.
4. Under the Permissions section, click the![]() button for each permission type and then select the Access, Create, Detail, Edit, and Delete checkboxes to provide the selected permissions.
button for each permission type and then select the Access, Create, Detail, Edit, and Delete checkboxes to provide the selected permissions.
5. Click to minimize the permission section.
6. Click the ![]() button. The custom role is updated.
button. The custom role is updated.
7. Click the button to cancel your action.
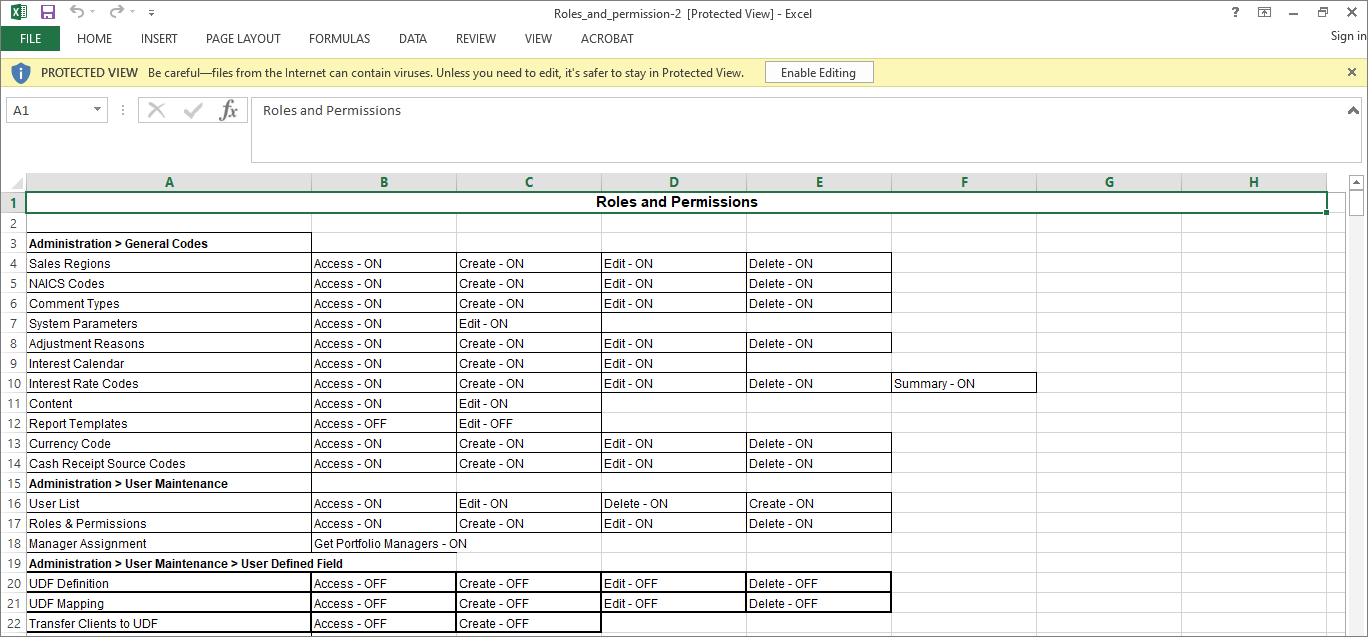
8. Click the  button to export to view the assigned permissions. A User Roles pop-up appears. You can modify the permissions for each role.
Refer to the screenshots:

10. The Select All option is enabled by default. You can click the Select All option to export all the fields or modify the permissions for the role and click the Export button. The selected fields are successfully exported.
Refer to the screenshot:
![]() Cync will allow the user to edit only user-defined roles. Cync will not allow the user to edit system-defined roles.
Cync will allow the user to edit only user-defined roles. Cync will not allow the user to edit system-defined roles.
The system-defined Role Type includes the following:
To delete a custom-defined role, perform these steps:
1. Go to Administration → User Maintenance → Roles and Permissions.
2. Click the Roles and Permissions tab. The Roles and Permissions page appears.
3. Select the custom role from the dropdown list.
4. Click the ![]() button. A confirmation dialog box appears.
button. A confirmation dialog box appears.
Refer to the screenshot:
5. Click the  button to confirm your action. A 'Record deleted successfully' message appears.
6. Click the  button to cancel your action.